반응형
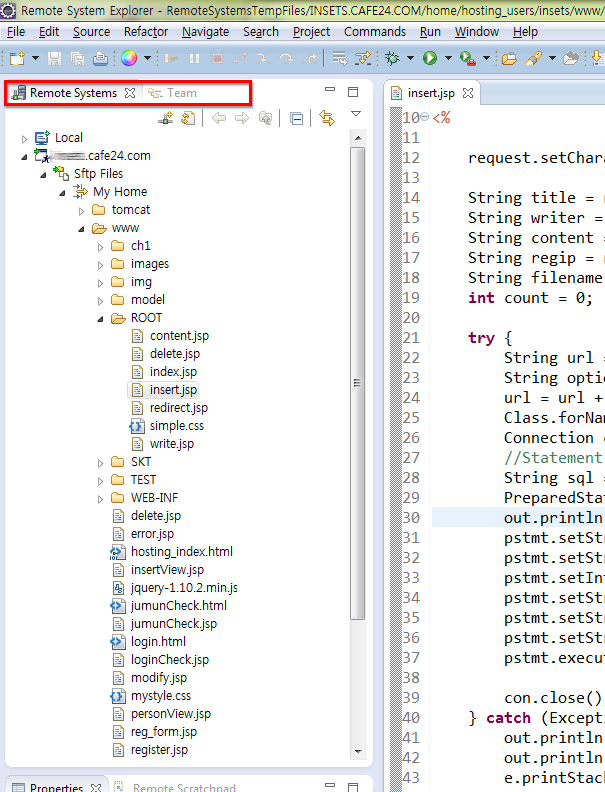
cafe24 같은 원격서버 구축할 때 이클립스의 "Remote System Explorer" 기능을 사용합니다.
이때 단순히 세팅만 하면 컨텐트 어시스트 기능을 사용할 수가 없습니다.
http://nope.egloos.com/viewer/5162205 이분의 포스팅을 보고 저도 성공했습니다. 이분은 PHP를 예로 들었지만 저는 JSP를 예로 들어 봅니다.
작업을 실행하기 전 만약을 위해 워크스페이스 폴더를 백업해두시는게 좋습니다.
1. 이클립스에서 Dynamic Web Project를 아무 이름으로 하나 생성. 예를 들어 JSPTemp 라고 하겠음.
2. 열려진 Remote System Explorer 리모트 폴더를 다 닫아주고 이클립스 종료.
3. 로컬상의 이클립스 workspace로 이동.
4. 폴더중에 'RemoteSystemsTempFiles'를 열어 .project파일을 열어서 내용 복사.
<?xml version="1.0" encoding="UTF-8"?>
<projectDescription>
<name>RemoteSystemsTempFiles</name>
<comment></comment>
<projects>
</projects>
<buildSpec>
</buildSpec>
<natures>
<nature>org.eclipse.rse.ui.remoteSystemsTempNature</nature>
</natures>
</projectDescription>
<projectDescription>
<name>RemoteSystemsTempFiles</name>
<comment></comment>
<projects>
</projects>
<buildSpec>
</buildSpec>
<natures>
<nature>org.eclipse.rse.ui.remoteSystemsTempNature</nature>
</natures>
</projectDescription>
5. RemoteSystemsTempFiles 폴더 삭제.
6. 이클립스에서 만든 프로젝트인 JSPTemp폴더내의 .project파일을 열어서
<?xml version="1.0" encoding="UTF-8"?>
<projectDescription>
<name>RemoteSystemsTempFiles</name>
<comment></comment>
<projects>
</projects>
<buildSpec>
<buildCommand>
<name>org.eclipse.wst.jsdt.core.javascriptValidator</name>
<arguments>
</arguments>
</buildCommand>
<buildCommand>
<name>org.eclipse.jdt.core.javabuilder</name>
<arguments>
</arguments>
</buildCommand>
<buildCommand>
<name>org.eclipse.wst.common.project.facet.core.builder</name>
<arguments>
</arguments>
</buildCommand>
<buildCommand>
<name>org.eclipse.wst.validation.validationbuilder</name>
<arguments>
</arguments>
</buildCommand>
</buildSpec>
<natures>
<nature>org.eclipse.rse.ui.remoteSystemsTempNature</nature>
<nature>org.eclipse.jem.workbench.JavaEMFNature</nature>
<nature>org.eclipse.wst.common.modulecore.ModuleCoreNature</nature>
<nature>org.eclipse.wst.common.project.facet.core.nature</nature>
<nature>org.eclipse.jdt.core.javanature</nature>
<nature>org.eclipse.wst.jsdt.core.jsNature</nature>
</natures>
</projectDescription>
진하고 밑줄친 부분처럼 수정하고 아래의 <nature>org.eclipse.rse.ui.remoteSystemsTempNature</nature>를 추가해줍니다.
7. JSPTemp 폴더 이름을 RemoteSystemsTempFiles로 바꾸어 줍니다.
JSPTemp 폴더 안에 있는 다른 하위폴더나 파일은 그대로 유지.
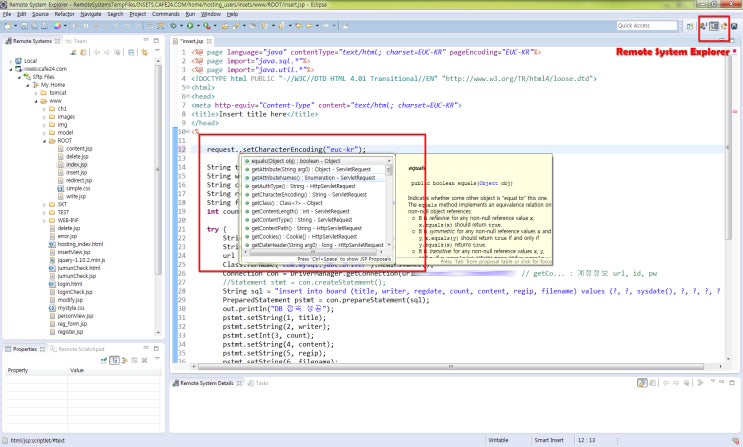
8. 이클립스를 켜고 리모트 서버의 파일을 아무거나 열어서 코드 어시스트가 되는걸 확인.
Remote System Explorer탭을 열면 이미지와 같이 컨텐트 어시스트 기능이 잘 작동되는걸 확인할 수 있습니다.
로그창에 에러가 주루룩 뜰수도 있는데 처음 켰을때 최초 한번만 뜨므로 걍 로그클리어 하고 신경꺼도 됨.
다음에 다시 이클립스를 켰을때는 뜨지 않으니 걱정말자.. -> 제가 할 땐 로그창에 에러 이런거 안나오더군요. 아주 깔끔하게 컨텐트 어시스트 기능이 작동했습니다.
반응형
'프로그램 및 소스' 카테고리의 다른 글
| 각 은행별 영문명, 영문주소, SWIFT (B.I.C) 코드 (0) | 2016.06.23 |
|---|---|
| Adobe 프로그램 재설치시 경로문제 (0) | 2015.07.14 |
| [XE] 서버이전시 XE설치경로가 변경되어 이미지가 엑박 뜰때 (0) | 2015.06.14 |
| 네이버맵(지도) 좌표 검색 XY LAT LANG (0) | 2015.05.26 |
| Windows 7 로그온 화면 변경하기 [Step by Step] (0) | 2015.05.22 |


